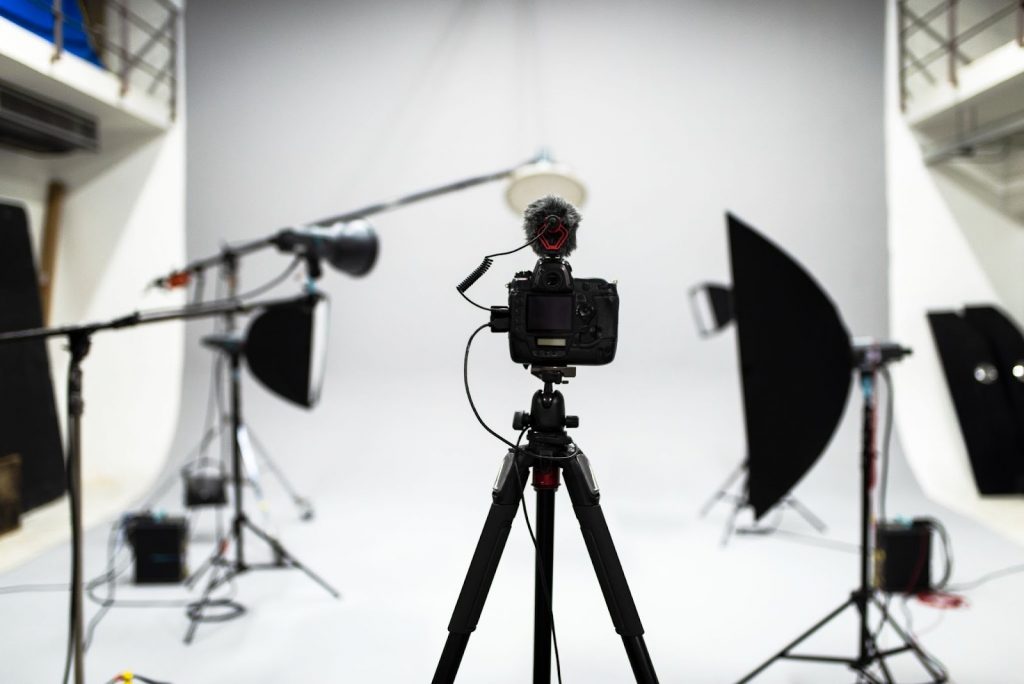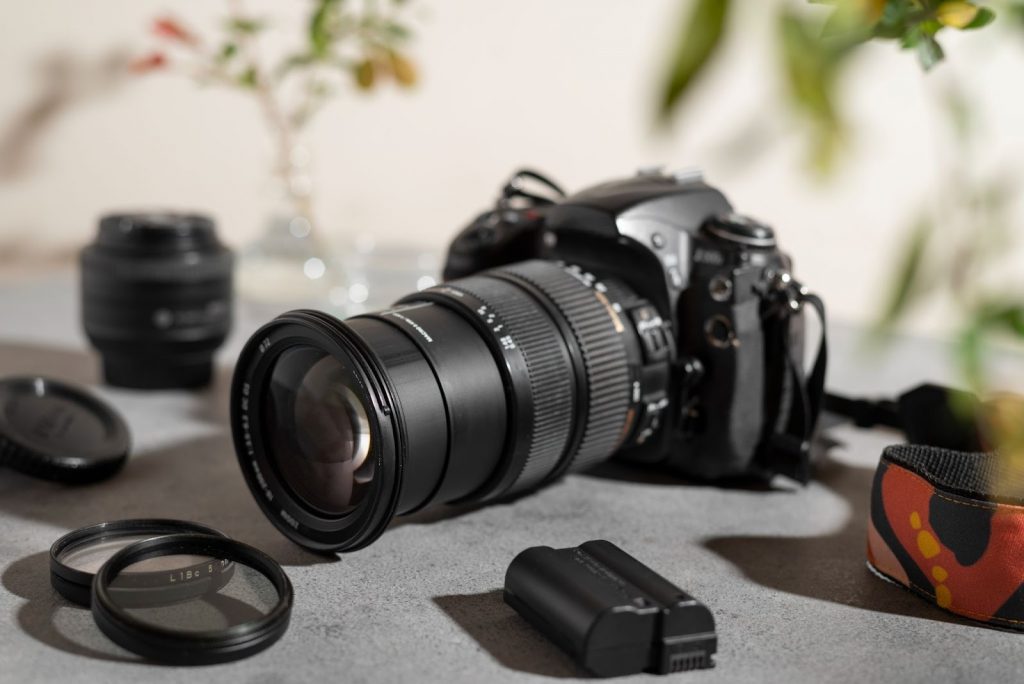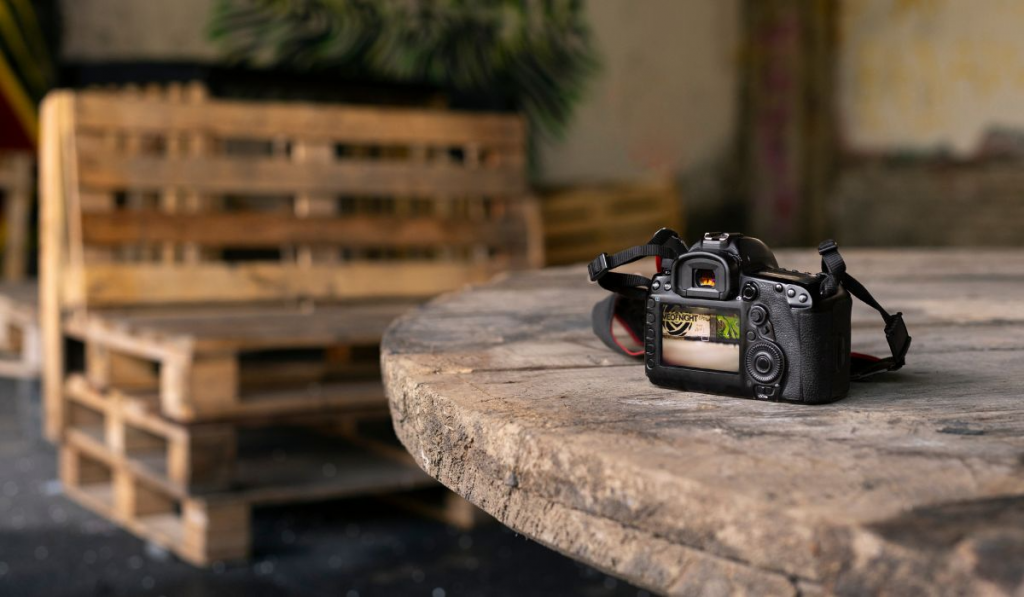

Launching a New Product in Montreal? Why You Need a Professional Photographer

You’ve invested your time, your money, and your energy into creating this product. And now you’re going to show it to the world or, at the very least, to Montreal. But before you press “publish” on your product page or share that teaser on Instagram, you have to ask yourself one question:

Are the visuals going to do your product justice?

Because let’s face it, no matter how innovative or high-quality your product is, if the photos don’t grab attention, you’re going to lose people before they even consider buying. And that’s precisely where a Montreal product photographer steps in.

Let’s dissect why attempting to DIY your product photos would end up costing you more in the long term and why hiring someone who understands the nitty-gritty of product photography is the more intelligent choice.

Professional Photographer

First Impressions Are Made Quick – Like, Super Quick

You’ve got at best a second or two to make a lasting impression online. That’s not fear-mongering, it’s reality. Scroll culture is merciless.

Your product image is usually the first thing that someone looks at. Not your product description. Not your company story. Just the picture.

And what do you think makes people pause their scrolling? Defining light. Crisp texture. Proper contrast. Clean edit. All the things a pro includes.

When your product is shot the right way, it talks. It conveys quality, trust, and value without uttering a word. You can’t replicate that sort of effect using your phone and a white bedsheet, no matter how perfect the lighting is on that day.

A Professional Photographer Knows More Than Just the Camera

Anyone can take a photo technically. But one that converts? That’s an entirely different set of skills.

Part of that strategy is reading the way Montreal neighbourhoods shape product photography, since Mile End reads differently from Vieux-Montréal and that texture carries into the final image.

An experienced Montreal product photographer does more than show up with fancy flash equipment. They arrive with hands-on, been-there-done-that experience that guides everything from the lighting decisions to prop selection to what your product should look like.

Prouct photographer understand what sells. They know how to compose a shot so a product appears inviting on the internet or in a magazine advertisement. They’ll consider where your pictures are going to reside: Amazon, Shopify, your own website, social media, and adjust the imagery accordingly.

You’re not hiring for pictures. You’re hiring for a strategy.

Bad Photography Doesn’t Just Look Unprofessional – It Hurts Sales

You can have the best product in your category, but if it looks cheap in the photo, that’s how people will perceive it.

Suppose you are starting a handmade skincare brand. You may have the most organic creams, locally produced, gorgeous with texture, but the photo is blurry, poorly lit or distracting, you are not getting across the message. Worse still, your potential client may close.

Professional product photography removes all that friction. It builds confidence. It makes people feel good about buying from you.

And when you’re trying to gain traction in a competitive market like Montreal, that edge matters.

Montreal product photographer

You’ll Actually Save Time (and Money) in the Long Run

This one surprises a lot of people.

DIY shoots consume hours. Users attempt to get the lighting correct. You reposition props. You spend an eternity editing. Then you look at the photo and realize that it still doesn’t resemble what you envisioned.

Now you’re back to square one and running behind.

Having someone who does this for a living means your time remains concentrated on the launch itself: generating buzz, getting your packaging done, and getting your sales funnel in place. The stuff that actually expands your business.

Let them do the visuals. That’s their job.

Consistency is Key – And Professionals Nail It

When someone lands on your product page or scrolls through your Instagram, consistency in your images makes your brand feel tight and polished. Everything lines up. The lighting feels cohesive. The tones match. The whole thing looks like it belongs together.

Try achieving that when you’re taking photos in different rooms at different times of day with whatever gear you’ve got lying around. It’s tough.

With Montreal product photography done professionally, consistency is not an accident. It’s integral to the process. Studio lighting, editing presets, shot lists, it’s all included.

It’s Not About Selling – It’s About Storytelling

People relate to stories. A photo isn’t about displaying your product; it’s about showing what it signifies, what it stands for, and how it relates to someone’s life.

Professional photographers are familiar with shooting with a story in mind. They are familiar with lifestyle shots. Professional photographers can evoke emotion. They will assist you in presenting your product in use, not just alone.

So whether it’s a kitchen gadget being held in a real kitchen, or an article of clothing styled on a real body, they know how to make your product seem real, desirable, and applicable.

You Only Launch Once – Make It Count

There’s something compelling about that “new product” buzz. It’s new. It’s sexy. People are listening for a brief moment.

Don’t blow it with lacklustre photos.

If you want to take your launch seriously, then you have to take your visuals seriously. That involves hiring someone who’s experienced, who’s done it with brands like yours, and who can help your product translate into photos that connect.

Because great pictures don’t just appear pretty, they deliver.

product photography

Not Sure Where to Begin? Here’s What to Care About in a Photographer

If you’re now wondering, “Okay, I need a pro, but how do I choose the right one?” here’s what it’s about:

  1. Portfolio
    Find someone whose photographs make you go, “I want that.” Points if they’ve photographed products like yours.
  2. Knowledge of Brand
    They should want to know your audience, your tone, and your intention, not merely what the product looks like.
  3. Flexibility
    A professional photographer accommodates your schedule and assists you in getting the most for your money.
  4. Studio Access
    Studio facilities and proper lighting play a huge quality and consistency advantage.
  5. Communication
    You need someone who’s open, collaborative, and a pleasure to work with. Chemistry matters.

The Real Cost of Not Hiring a Professional

Let’s turn the tables for a moment.

What’s the price tag of not hiring a pro?

  • A painful launch because you’re stuck re-shooting.
  • Weaker conversion rates because the photos don’t relate.
  • A bargain-basement product that doesn’t represent the quality of what you do.
  • Missed business opportunities because your work didn’t pop.

When you put it like that, hiring a pro is an investment in getting it right the first time.

Ready to Take Your Product Launch to the Next Level?

No matter what product you’re launching, a beauty brand, a new line of green home products, or a new food item, how you visually showcase it is the key to everything that comes next.

You don’t require more equipment. You don’t need more YouTube tutorials. Users require someone who understands.

And that is where Montreal product photography comes into play.

Don’t Just Launch. Launch Like You Mean It.

You’re putting something new into the world. That’s not small. That’s not ordinary. So don’t treat the visuals like an afterthought.

If you’re ready to get serious about your product launch, it’s time to bring in the pros. Book a shoot, ask questions, get clarity and let your product shine the way it deserves to.

The correct images are speaking on your behalf before you even say a word. Ensure they are saying the right words.

Hire a confident, authentic, results-oriented Montreal product photographer who understands how to make your product look as impressive as it truly is.

A Pre-Launch Shot List: What Images You Actually Need Before Day One

Most first-time launchers under-budget the volume of imagery a single product needs. A handful of pretty hero shots feels like enough, until the product page goes live and you suddenly realise the storefront wants three angles, the Faire listing wants four, and the press email wants something landscape with copy-space for a headline.

Work backwards from the channels you actually plan to publish on. A typical Montreal launch shot list looks roughly like this:

  • Hero packshot on white: usually 1 to 3 angles per SKU, framed for storefront thumbnails and category grids.
  • Detail crops: material, stitching, label, closure, finish texture. Often 2 to 4 per SKU, depending on how much the buyer is going to zoom in.
  • Scale-reference shot: one image where the product is held or placed beside a recognisable object, so size doesn’t get misread on a phone screen.
  • Lifestyle and in-use scenes: 3 to 6 frames showing the product in the kind of room or moment it’s actually for. These tend to do the heaviest lifting on social posts, on email creative, and in the storefront’s secondary gallery slots that buyers tap through after the hero.
  • Packaging and unboxing: closed box, opened box, contents laid out. Useful for retail buyers and for the still frames in Reels-style unboxing video.
  • Press-kit thumbnails: landscape and square crops with clean copy-space, so journalists can drop the image into a layout without asking for a re-export.

That adds up to roughly 12 to 25 distinct images per SKU, not the six you started counting on the back of an envelope. If you are launching a five-product capsule, the asset count grows fast, which is why the bigger savings from working with a pro show up at the planning stage, not the shutter-click stage.

If your launch will live on a WordPress storefront, our WooCommerce product photography guide walks through how those same assets map to gallery slots, variation thumbnails and PDP zoom crops, so nothing is shot in the wrong aspect ratio and re-cropped later.

Working Backwards from Launch Day: A Realistic Montreal Production Timeline

Pick the date the product is actually going on sale, then build the calendar backwards from there. In our Montreal studio, a typical small-batch launch needs roughly four to six weeks between the first brief call and the final retouched deliveries, sometimes longer when shipping samples from outside Quebec is involved.

A working-backwards timeline tends to fall into four blocks:

  1. Six to four weeks out: brief, moodboard, sample logistics. This is when you lock the brand references, confirm which SKUs are camera-ready, and ship physical samples to the studio. If the product is still in pre-production, the cutoff is when a representative final sample exists, not a working prototype.
  2. Four to three weeks out: pre-production. Shot list signed off, props sourced, models or hand-models cast if lifestyle is in scope, location scouted if any frames are leaving the studio. Most of the budget protection happens here, since changes after this point usually mean reshoots.
  3. Three to two weeks out: shoot days and selects. One to two shoot days for a small capsule, more for a larger range. Raw selects typically come back within 48 to 72 hours so you can confirm coverage before the studio strikes the set.
  4. Two to one weeks out: retouching rounds. Usually one full round of edits, then a tight second pass for tweaks. Allow buffer for the moment a stakeholder you forgot to loop in suddenly has notes on the colour of the background.

Launch week itself should be quiet on the production side. Final deliveries land a few days before publish so the storefront, ad creative and email assets can be staged and previewed in real templates, not against a deadline.

If the shoot finishes well ahead of the on-sale date and you are sitting on assets you cannot yet show, a quiet pre-launch lookbook is a useful place to park hero frames, build email momentum, and give wholesale buyers a preview without breaking the embargo on the actual product page.

Frequently Asked Questions

Q: Why use a professional photographer?
Due to the fact that you are not just buying photographs, you are buying how your product is viewed. A professional adds strategy, consistency and that professional appearance you can never imitate.

Q: Why is professional photography necessary?
It establishes trust. The clarity of the crisp images makes your brand look legitimate, and this enables other people to be comfortable making purchases with you.

Q: Why is product photography so crucial?
That is what people see at first glance. Unless they get hooked by the picture, they are lost. That’s it.

Q: What is the 20 60 20 rule of photography?
It is a composition gimmick: 20% highlights, 60% intermediate, 20% shadows. Balances the photos and is simple to view.

Related guide: If your launch will pursue press coverage, also see our dedicated guide to press kit & brand launch photography Montreal.

How to Choose a Photography Studio That Fits Your Brand?

Your brand offers your audience a message, a personality, and a promise, rather than just a logo. Selecting the appropriate photography studio can either enhance or diminish that message. Product photography in Montreal is crucial in a visual-driven market, as it significantly influences consumer impressions of your products. From post-production to lighting and styling, every element must align with your brand’s values and character.

Aligning your studio decision with your brand strategy ensures consistency and credibility, whether you’re launching a new line or revamping your existing images. But where can one locate a studio that really “gets” your brand?

Understand Your Brand Identity First

Turn inside first, then glance outside. Selecting a studio that aligns with your concept begins with understanding your brand. Consider: What does your brand stand for? Is it raw and honest, whimsical and brilliant, or opulent and basic?

Your brand tone and look should direct your choice of studio. A mismatch, for example, working with a studio known for edgy, high-contrast images while your brand is all about warmth and simplicity, might compromise your entire marketing campaign.

Identifying your fundamental brand values, desired visual tone, and target audience provides a compass for determining how well a studio’s portfolio meets your needs.

Review Portfolios With a Strategic Eye

Viewing portfolios is more than just appreciating lovely images. This is a strategic exercise. Look for variety, consistency, and whether their past work aligns with the visual language your brand requires.

Review a portfolio and ask whether their lighting choices complement the aspects of your product.

  • Their handling of hues and textures?
  • Is the retouching natural or highly aggressive?
  • Does their style and layout make sense for your brand?

Also, check whether they have experience dealing with companies similar to yours. If you run a local skincare brand, a studio with a background in fashion or cosmetics photography may already be familiar with the subtleties of capturing soft textures or shiny surfaces. Here is where Montreal product photography experts can shine—by proving a sensitivity to your field of business.

Assess the Studio’s Creative Process

No two studios run in the same way. Some provide a very cooperative experience, while others prefer a simplified, hands-off approach. Both can work depending on your needs, but only if you know what to expect.

  • Inquire about the creative process of possible studios.
  • Should we start with creative briefs or mood boards?
  • Are there chances for comments throughout the filming?
  • Over styling and props, how much influence do you have?

Early in the process, studios that provide brand advice typically produce more customized results. A studio should be cautious if it starts shooting without first thoroughly understanding its brand. Before they begin documenting your story, a professional product photography in Montreal will want to know more about it.

Consider Technical Capabilities and Equipment

Technical accuracy combined with creative vision produces a visually striking image. Although artistic sensibility is crucial, a studio also needs tools and space to produce the desired outcomes.

Review the technical details of their arrangement:

  • Do they use high-resolution cameras suitable for both print and web use?
  • Is their lighting system flexible enough to accommodate various product types?
  • Can they handle transparent, reflecting, or complicated objects?

Particularly for online stores, outstanding clarity and detail are non-negotiable. The best Montreal product photography companies combine modern tools with imagination to ensure your products are showcased in the best light. Brands that sell through more than one channel should also confirm the studio is fluent in the marketplace listing standards their platforms enforce.

Evaluate Communication and Professionalism

Never undervalue the force of effective communication. Although a studio may have fantastic images, its difficulty in working with could throw off your creative aspirations and timetable. Professionalism encompasses everything from email responses to on-set behaviour to post-project follow-up.

In your first contacts, pay close attention. Are they careful? Do they query your brand? Do they offer well-defined pricing policies and schedules?
More than just technical skill, a studio dedicated to quality will provide dependability, reactivity, and a genuine enthusiasm for your achievement.

Don’t Choose on Price Alone

Although it is always a factor, try not to let your budget define you. Cheaper choices may cut corners or produce uneven outcomes, ultimately costing you more in the form of reshoots or lost customer engagement.

Think instead in terms of value. Given the cost, what are you getting? Are there any changes? The turnaround time is what? Does future campaign planning allow for adaptability?
One long-term investment in your brand is quality photography. It is well worth the cost to work with a company that can consistently provide on-brand visuals and understands your brand identity.

Visit the Studio If Possible

If you work locally, visiting the studio can provide information that is not available on a website. You will tour the area, meet the staff, and get a sense of how professionally and orderly their business run.

Reading up on the character of Montreal’s photo-friendly neighbourhoods before the tour can sharpen what you look for once you’re inside, from the loading dock setup to how natural light hits the shooting bay.

This stage encourages you to have faith in your choice. When organizing long-term projects, in-person interactions are especially beneficial, as they allow you to establish expectations early on and prevent subsequent misinterpretation.

Questions to Ask Before You Sign a Contract

The contract is where good intentions get tested. A few specific questions surface a studio’s real operating habits.

Ask how reshoots are handled in writing. A line that promises “reshoot if needed” without naming a trigger (lighting fault, focus miss, art-director sign-off rejection) is harder to enforce than buyers expect.

Ask which usage rights are granted at what price. A package priced for editorial often does not cover paid social or paid search placements, and discovering that gap mid-campaign costs more than the original quote.

Ask who keeps the RAW files. Some studios deliver only retouched JPEGs and treat the negatives as house property; others release the RAWs for an added fee. Neither answer is wrong, but you should know which one you are agreeing to before you book.

Ask about turnaround hedging. A studio that gives a range, such as “typically three to five business days after the proof round closes,” is often more truthful than one that quotes a flat number.

Montreal Logistics That Affect Your Shoot Day

Generic checklists rarely cover the practical friction of working in this city. A few local realities are worth confirming before you commit.

Drop-off windows matter more than they sound. Some studios here sit in mixed-use buildings where freight elevator access is restricted to weekday morning windows, which can derail a Friday afternoon courier with a fragile prototype. Confirm freight access in advance if you are shipping bulkier items.

Bilingual contracts are normal here, not a special favour. If your team writes in French, ask whether the studio will issue and sign a French-language master service agreement; a studio that hesitates may not be set up for FR-language buyers at scale.

Tax line items deserve a look. Incorporated buyers will see GST and QST broken out on a Quebec invoice, and a studio whose proposal folds everything into “all-in” pricing usually has to redo the paperwork before your accounts payable team can process it.

Tethered capture during the shoot lets an art director sign off on framing and lighting before the next setup, which typically removes a full round of post-shoot back-and-forth.

Red Flags Worth Disqualifying On

Most warning signs show up in the proposal stage, not on shoot day. A studio that cannot answer the following clearly is, in our experience, not ready for buyer-facing work.

No written reshoot policy. “We’ll figure it out” is a budget overrun waiting to happen. Insist on something in writing, even a short clause.

No usage-rights tier. If the same fee covers editorial, organic social, paid social, and out-of-home, the studio either has not thought about licensing or is hoping you will not ask.

No pre-shoot test or sample. Studios with experience in fragile, reflective, or textured product work typically offer a paid lighting test before the main shoot. If that option is not on the table, the cost of a full reshoot lands entirely on the buyer.

No on-site preview option for remote buyers. Brand owners who cannot attend need either tethered capture streamed in real time or a same-day proof gallery. A studio that defers proofs to “next week” is a poor fit for tight launch calendars.

Vague answers about who keeps the RAWs. This often signals a studio that has not had to defend its position to a buyer’s legal team.

A Brand-Fit Portfolio Audit: What to Actually Look For

A portfolio reads better as a checklist than as a feeling. Once you have shortlisted two or three studios, walk through their work the way you would a competitor’s catalogue.

Look first at lighting consistency across batches. If a studio shoots the same SKU twice, does the highlight roll the same way both times, or does the gradient shift because the modifier moved? Catalogue work lives or dies on this repeatability, and a portfolio that mixes setups on the same product is a warning more than it is variety.

Colour accuracy across same-product shots is a related test. Pull two thumbnails of the same item, ideally a coloured fabric or packaged consumable, and check that the brand colour reads the same in both frames. A small monitor will not confirm a Pantone hit, but it will tell you whether the studio noticed when colour drifted.

Prop and styling discipline shows up in the negative space. A stock prop dropped in to fill empty space leaves a different fingerprint than one sourced from a styling brief. Ask which props were sourced for the shoot and which travelled in from a closet.

Platform image specs deserve their own pass. If your products will live on Amazon, the main image needs a pure white background, a single product on the page, and a long-edge resolution the studio should know without checking. Shopify aspect ratios are squarer than Etsy thumbnails, and a portfolio that leans on lifestyle frames may not have a clean record on the templated detail-page work that drives marketplace conversion.

Lighting and Colour Pipeline: Matching a Studio to Your Category

The pipeline a studio runs is partly a craft choice and partly a category fit. A buyer does not need to be a technician to ask informed questions; knowing which to ask narrows the shortlist.

Continuous light or strobe is the first fork. Continuous lighting lets the team see the result while they shoot and works well for textured surfaces and slower setups. Strobes carry more punch and freeze motion that LED panels cannot, which matters for liquids, splash work, or anything that needs short flash duration. Ask which the studio prefers for your category, and listen for a reason rather than a brand name.

The modifier philosophy follows from there. Soft-boxes give broad, even fall-off and forgive small product-positioning shifts. Scrims and bounce produce controlled wraparound at the cost of setup time. Hard reflectors create the sharp specular cues that make jewellery and chrome read as metal rather than as grey plastic.

Colour-checker passes and ICC profile use are easy to ask about and revealing when the answer is hedged. A team that shoots a colour target at each setup and embeds a profile in delivered files is offering a real audit trail; a team that skips it hopes the white balance in post is close enough. Monitor calibration cadence sits in the same category, and uncalibrated screens explain why retouch rounds ping-pong without converging.

Category fit pulls these threads together. Apparel rewards soft, broad lighting and skin-safe colour discipline. Jewellery needs harder light and reflective control. Food and beverage want fast exposures, often with a tethered art director in the loop. A studio that talks fluently about the gap between your category and its prior work is the safer bet.

Choosing with confidence

The ideal photography studio should be an extension of your brand team. Their job is to translate your brand message into visually appealing, consistent, high-quality images that appeal to your target market, not only to snap pictures.

Take the time to explore the relevant issues and refuse to settle for anything less than a perfect fit. When the images complement your messaging, your products feel natural to your consumers, rather than merely appearing nice.

Let Your Brand Shine from the Correct Studio

Selecting a photographic studio is about alignment, confidence, and inspiration. If you’re ready to enhance your visual branding, rely on a studio that knows how to combine design with business acumen. Our team is here to provide photographs that clearly and confidently represent your brand for companies seeking a consistent and professional partner in Montreal product photography.

Let us define your brand so it shines. Schedule a consultation to learn how professionally shot images can benefit your company.

Frequently Asked Questions

1. Why is your studio unique among Montreal’s numerous choices for product photography?
Our areas of concentration include brand alignment, creative teamwork, and professional consistency—that is, images that capture your narrative.

2. Can I bring my creative team or stylist?
Indeed, we are pleased to collaborate with your creative team to bring your idea to life and encourage cooperation.

3. Do your photographic packages include retouching and editing services?
Professional retouching and colour correction are included in all our packages to meet your brand requirements.

4. How do I get started using your studio?
Book a consultation or get in touch directly by visiting https://productphotographymontreal.ca. We will walk you from idea to execution.

Further Reading: Montreal Product Photography Resources

Explore related guides to strengthen your 2026 product photography plan:

Explore More Product Photography Resources

If you are deciding between studios for your Montreal brand, these related guides will help you scope your shoot accurately:

The Evolution of Product Photography Montreal in the Digital Age

From Film to Digital: The Transformation of Product Photography

Product photography in Montreal looks very different in 2026 than it did even three years ago. What was a film-and-catalogue discipline two decades ago is now a digital, multi-format job where a single client brief can demand stills, 9:16 video, a 360 spin set, and a few AR-ready assets, sometimes from the same shoot day. The opportunities for Montreal brands have multiplied, and so have the expectations attached to every product image that goes live.

The Rise of E-Commerce and the Demand for Product Images

The growth of e-commerce platforms has fundamentally changed the role of product photography. Where businesses once needed a few images for a print catalog, today’s online retailers require multiple high-quality images per product — white background shots, detail close-ups, lifestyle images, and even 360-degree photography. This explosion in demand has made professional product photography an essential service for businesses of every size in Montreal.

How Technology Has Changed the Game

Digital cameras with ever-increasing resolution and dynamic range produce images that capture every detail of your product. Tethered shooting allows photographers to review images in real-time on calibrated monitors, ensuring quality before moving to the next shot. Advanced retouching software makes complex techniques like ghost mannequin compositing and intricate jewellery retouching possible at a level of precision that was unimaginable just years ago.

LED lighting technology has made continuous studio lighting more practical and colour-accurate than ever. Colour management workflows ensure that the colours you see in your product photos match the actual product, reducing returns and building customer trust.

Computational Photography on Set: Focus Stacking and AI Background Removal as Studio Plumbing

Computational techniques moved from post-production novelty to standard studio plumbing across the last three years in Montreal. Focus stacking, where a sequence of identical frames with shifted focal planes is combined into one fully sharp image, is now the default capture method for jewellery, eyewear, and watch shoots in most of the briefs I work on. The shift came not from new cameras but from tethered capture software that automates the bracketing, and from blending tools that match the focus pyramid to the exposure stack without the manual mask painting that made the technique slow in 2022.

AI background removal sits in the same category. The 2024 generation of segmentation models cleaned the cuff of a sleeve against a knit sweater or the inside curve of a wine glass against a black backdrop closely enough that a junior retoucher’s first hour now goes to refining a generated mask rather than building one from scratch. For a Montreal studio quoting a high-volume catalogue, that compresses the post timeline meaningfully on simpler categories and lets the senior retoucher spend their pass on the parts of the image that still need a human eye. Both techniques are why our post-production walkthrough reads differently in 2026 than the 2023 version: the studio is doing more on capture day, and the post hours go further when they start.

Montreal’s Product Photography Scene Today

Montreal has always been a creative city, and its product photography scene reflects that. From dedicated e-commerce studios handling high-volume Amazon and Shopify photography to boutique studios specializing in food and beauty photography, the city offers a wide range of specialized product photography services. The vibrant creative community in neighbourhoods like Mile End, the Plateau, and Griffintown drives innovation in how products are photographed and presented. As more boutique players enter the market, brands are putting fresh emphasis on evaluating studio fit for digital-first brand imagery rather than just chasing the lowest day rate.

Current Trends in Product Photography

What lands in my brief inbox in 2026 looks very different from a 2022 brief. Short-form vertical video has overtaken horizontal in the work I get asked to shoot, and clients who used to ask for a single hero still now want hero, lifestyle, packaging-detail and a 9:16 video stitched from the same set day. 360-degree spin sets, once a premium add-on, are closer to table stakes for higher-AOV categories like watches, eyewear and small kitchen appliances. Sustainability briefs have shifted from a vague ask for natural styling to specific requests around sourcing the props themselves locally and avoiding single-use shoot waste. And lifestyle imagery has split into two lanes: high-production editorial for paid placements, and a deliberately rougher, creator-style cut for organic social.

The Future of Product Photography in Montreal

As technology continues to evolve, Montreal’s product photography industry evolves with it. AI-assisted retouching, virtual staging, and automated photography workflows are emerging tools that complement — but do not replace — the creative eye and technical skill of professional photographers. The fundamental need remains the same: businesses need compelling product images that drive sales, and Montreal’s product photography professionals deliver that.

AI Image Generation in 2026: Where It Fits, and Where It Doesn’t

Generative tools are part of my workflow in 2026, but not where most clients assume. Where I use them: background variation for white-cyc stills, removing distracting props from existing shots, generating environment plates so a real product shot can be composited into a synthetic scene, and quick mood-board comps before a shoot. Where I don’t use them, and where most of my Montreal e-commerce clients stopped using them late in 2025, is the actual hero shot of the product itself.

The drop in conversion rate when a real product image was swapped for a fully generated one was consistent enough across categories to reverse the experiment for almost every client who tried it. Marketplaces tightened their stance too, with trust-and-safety teams flagging listings whose hero images don’t match the physical product on arrival. The honest version of this story is that generative AI shortens the supporting deliverables and lets the shoot day focus on the frames a customer actually uses to decide whether to buy. For brands considering a fully synthetic catalogue, our portfolio of recent Montreal shoots shows the level of category-specific detail that drives those conversion gaps.

The Labor-Market Shift Inside Montreal’s Product Photography Studios

The Montreal product photography labor mix in 2026 is not where it was when generative tools first hit the conversation in late 2022. Junior retouching seats that used to absorb the bulk of an e-commerce shoot are fewer, and the work those seats did has shifted toward mask refinement, colour calibration across delivery channels, and quality control on the AI-cleaned mid-stack. The senior retoucher’s role is more concentrated on the frames a generative model still cannot fix: complex reflective surfaces, fabric drape under raking light, and packaging copy where the typography has to stay sharp at thumbnail size.

The same shift is changing the freelance-versus-studio decision for brands. A small Montreal brand that used to hire a freelance photographer plus an offshore retoucher can now hire a studio that runs computational capture and in-house retouching on a tighter timeline, often at a comparable line-item cost. The trade-offs are real on both sides, which is why our studio versus freelancer comparison stays a frequent first read for first-time buyers in the Montreal market. The other practical shift is contracts: licensing language around generative augmentation, model-image use, and AI-training opt-outs is appearing in standard photography agreements this year, and our licensing and usage rights guide walks through the clauses brands ask about most often.

AR Try-On and 3D Viewers: The New Asset Deliverable List

Apple’s RoomPlan and Google’s Scene Viewer settled enough across 2025 that AR try-on stopped feeling like a novelty for the apparel and furniture brands I shoot in Montreal. The practical change is in the deliverable list. A 2022 furniture shoot might end with twelve retouched stills and a packaging detail. A 2026 shoot for the same client now adds a USDZ file for iOS Quick Look and a glTF for Android, both built from a clean turntable capture that doubles as a 360 viewer on the product page.

For apparel, especially eyewear and accessories, the 3D asset is usually scanned separately from the hero shoot but shares the same colour reference set so the AR preview matches what the customer sees on the PDP. Budget-wise this added roughly a day per SKU group when we first started building these in 2024, and is closer to a half-day now that the pipeline is more standardised across categories. For a fuller scoping conversation around how this fits into a larger brief, our commercial product photography brief page walks through the multi-deliverable budget.

Vertical-First Social Commerce: Set Design for 9:16

TikTok Shop, Instagram Reels and YouTube Shorts pulled the centre of gravity for paid product placement to 9:16 by the middle of 2025. I now frame the camera vertically first for most product briefs, then crop down for the square and 16:9 deliverables. The set design knock-on is that the dead space above and below the product matters more than the negative space to the sides.

Tabletop products want a taller backdrop sweep than the old 4:3 setup demanded, and overhead pull-backs need room for caption and end-card overlays without crowding the hero. The other change is shoot pacing. A vertical product brief in 2026 usually expects three to six short clips per SKU baked into the same shoot day as the stills, so the storyboarding happens before the gear leaves the studio rather than between setups.

Marketplace Spec Changes Since 2024 That Actually Moved Rankings

Two marketplace changes since 2024 forced concrete reshoots for Montreal clients I work with. Amazon’s main-image policy update in mid-2025 tightened how much packaging and accessory clutter is allowed in the primary frame, and category-team enforcement caught up with it. Listings that had drifted into “main image with three garnish props” got flagged or suppressed. The cleaner reframing matched what high-conversion sellers were already doing, but the timeline forced a lot of reshoots inside a few weeks.

Etsy’s first-image weighting shifted in the opposite direction across 2025: a lifestyle-first hero now outperforms a white-background hero across most handmade categories, especially home goods and jewellery. For sellers running both channels from the same catalogue, that means budgeting for two distinct hero frames per SKU rather than one. For the full breakdown of current specs across Amazon, Shopify and Etsy, our 2026 e-commerce photo requirements guide is the working reference I send clients before quoting.

Color Fidelity Across Modern E-Commerce Platforms

The color a customer sees on a Shopify product page is rarely the color a customer sees on a TikTok ad creative, and neither one matches what you signed off on a calibrated retoucher monitor. Platforms diverge in how they ingest and re-encode imagery, so a Montreal SMB selling a single SKU into Amazon, Shopify, Meta, and print can end up with four visibly different versions of the same product. I run an ICC profile workflow on my side and tag exported files for sRGB, but the gap between a calibrated studio monitor and an end-consumer phone screen is real, and a beige that reads correctly in studio can drift warm on certain device defaults.

When you quote a photographer this year, ask how they handle color delivery for each channel you sell on, whether they soft-proof against a print profile when packaging shots are in the brief, and how they convert hero stills for the smaller color spaces ad creatives still ingest.

Mobile-First Rendering and What Core Web Vitals Mean for Product Image Briefs

The split between what looks good in a studio review and what loads cleanly on a customer’s phone widened across 2024 and 2025 as Google rolled Interaction to Next Paint into Core Web Vitals as a stable metric. Mobile traffic now sets the Largest Contentful Paint timer on most Montreal e-commerce product pages, and the hero product image is the element most often blocking it. A four-megabyte JPEG that looked appropriate for a desktop retoucher review can push LCP past the 2.5-second “good” threshold on a mid-range Android over a 4G connection, and that delay is an indexed ranking input now, not just a user-experience nuisance.

Three practical changes are showing up in the briefs I quote this year. First, hero stills are exported in AVIF or WebP with sRGB tagging, not just JPEG, so the gallery can serve a smaller variant via srcset to phones. Second, the gallery itself is built to lazy-load below the fold and to avoid a heavy JavaScript carousel that drags Interaction to Next Paint into the slow band. Third, the storefront’s product page template is tested against the Lighthouse mobile profile before launch, so the photographer and the developer share the same LCP target for hero delivery. For sellers on the WooCommerce side of the catalogue, our WooCommerce product photography handbook walks through the export and srcset workflow we use to keep the hero inside the threshold without sacrificing visible detail.

Sustainability and Current Studio Workflow

Quebec clients I quote in 2026 ask about studio sustainability earlier in the conversation than they did even two years ago, and most of them want concrete answers rather than a vague natural-light claim. The practical levers are not glamorous: reusable seamless backdrops swapped in for single-shoot paper rolls, LED continuous lighting where the brief permits it (the energy footprint per shoot day is meaningfully smaller than a full strobe rig for tabletop work), paperless contact-sheet review through shared cloud galleries, and propping choices that lean on materials the studio can return, reuse, or recycle.

For packaging-led shoots, the props often double as the deliverable: a cardboard riser used to elevate a hero bottle becomes part of the recyclable shoot waste, not landfill. None of this replaces production-grade strobes when a brief calls for them. A beauty client needing color-critical hero stills will still want a calibrated strobe pull, and that is the honest framing of a layered choice, brief by brief.

Bilingual and Québécois Visual Discipline on Set

Montreal product shoots almost always carry a bilingual dimension that a non-local studio can miss. French-language on-pack typography needs the same legibility treatment as the English copy, which means the framing has to leave the French panel readable at thumbnail size on a phone, not just the English one. OQLF guidance on visible French language on Quebec-market packaging shapes which face of a box becomes the hero side, and a shoot brief that ignores that ends up with main-image deliverables that look correct in a Toronto deck but invite a relabel-and-reshoot for the Quebec market.

The cultural visual cues matter too: Québécois lifestyle scenes for food, beverage, and home goods clients read truer when the background props, signage, and kitchenware fit the local market rather than a generic North American studio set. A Montreal photographer working for both Anglophone and Francophone audiences is reading the brief through both lenses on every frame. Teams planning that dual-language production often find our notes on French and English brand imagery workflows for Quebec buyers useful when scoping a Montreal shoot.

Partner with Montreal’s Product Photography Experts

Whether your business is just starting out or you are looking to elevate your existing product imagery, working with an experienced Montreal product photography studio ensures your products look their best across every platform and channel. Get in touch to discuss how we can help your brand succeed in the digital age.

Further Reading: Montreal Product Photography Resources

Explore related guides to strengthen your 2026 product photography plan:

Related Montreal Product Photography Reading

If you found this evolution piece useful, these related resources dig deeper into specific parts of the Montreal product photography landscape:

Related Reading on Modern Product Photography

Montreal product photography has evolved quickly in the last few years. These companion guides cover the specific visual shifts driving the change:

Where Product Photography Montreal Is Heading Next

The categories driving the next wave of Montreal product photography include specialty and artisan segments that require dedicated workflows. Explore our newest specialty pages:

Related Montreal Product Photography Guides

If you found this guide useful, the following resources from our Montreal product photography studio go deeper on adjacent topics:

Ready to book a shoot? Contact our studio or review our pricing.

How Good Product Photography Can Help Your Business Grow in Montreal

The Direct Impact of Product Photography on Sales

For Montreal businesses selling products online, professional product photography is not a luxury — it is a necessity that directly impacts your bottom line. Studies consistently show that high-quality product images are the number one factor influencing online purchase decisions, ahead of product descriptions, reviews, and pricing. If your product images do not meet the standards that today’s online shoppers expect, you are losing sales to competitors who invest in professional photography.

How Better Images Increase Conversion Rates

The connection between product photography quality and conversion rates is well-documented. Professional images build trust — they signal that your business is established, reliable, and confident in the quality of its products. When a customer sees crisp, well-lit images on a clean white background, they feel more confident about what they are buying. This confidence translates directly into higher conversion rates and fewer abandoned carts.

Multiple images per product, including different angles, detail shots, and lifestyle images, further increase conversions by answering customer questions visually. When customers can see exactly what they are buying from every angle, they buy with more confidence and return products less frequently.

Reducing Return Rates with Accurate Product Photography

Returns are expensive for any business, and one of the most common reasons for e-commerce returns is that the product does not match the customer’s expectations based on the photos. Professional product photography in Montreal ensures accurate colour representation, true-to-life proportions, and detailed views that set correct expectations. This accuracy reduces the gap between what customers expect and what they receive, significantly lowering return rates.

Standing Out in Montreal’s Competitive Market

Montreal is home to a thriving business community across every sector — fashion and apparel in Mile End and the Plateau, food producers at Jean-Talon Market, tech startups in Griffintown, and artisan makers across the city. In this competitive landscape, professional product photography gives you an edge. When a customer is comparing your jewellery, clothing, food products, or cosmetics against competitors, the brand with better photography wins the click — and the sale.

Many of our prospective clients ask to see finished commercial product shoots from past Montreal studio assignments before committing, and those reference frames consistently help them visualize what their own catalogue could look like.

Product Photography and Search Engine Visibility

Professional product images also support your search engine optimization efforts. Properly optimized images with descriptive file names and alt text help your products appear in Google Image search results, driving additional traffic to your online store. Fast-loading, properly sized images also contribute to better page speed scores, which is a ranking factor in Google’s algorithm.

The ROI of Professional Product Photography

When you compare the cost of professional product photography to the revenue it generates, the return on investment is substantial. Consider what a single high-quality product image earns over its lifetime — it appears on your website, marketplace listings, social media, email campaigns, and marketing materials. For a deeper understanding of product photography costs, see our Montreal product photography pricing guide for 2026.

Growing Your Montreal Business with Better Imagery

Whether you sell on Amazon, Shopify, Etsy, or your own website, investing in professional product photography is investing in the growth of your business. At Product Photography Montreal, we help businesses across the city create imagery that sells. From clean e-commerce shots to creative flat lay and lifestyle content, we provide the visual assets your business needs to grow. Contact us today for a free consultation.

Further Reading for Montreal Business Owners

Building revenue through product photography is a multi-step investment. These resources cover the practical next steps most Montreal brand owners face:

Guides to Grow Your Montreal Business With Better Photography

These related guides give you concrete next steps once you decide to invest in professional imagery:

Regional and Category Resources for Montreal Business Owners

If you are a Greater Montreal business owner planning a photography investment, these category and neighbourhood-specific guides will help you scope the work:

Related Montreal Product Photography Guides

If you found this guide useful, the following resources from our Montreal product photography studio go deeper on adjacent topics:

Baseline Metrics Montreal Small Business Owners Can Track

Before booking a reshoot, a small-business owner in Montreal can gather a short baseline of how the current product images actually perform. The most accessible signals come from your existing storefront analytics: the add-to-cart rate on each product page, the post-purchase return rate by SKU, the average time-on-page for the listings you care about most, and the post-purchase review rating that customers leave once the product arrives. Track these four numbers for a steady two to four week window, holding price, traffic source, and promotion mix as stable as you can during that period. The aim is a real anchor reading, not a one-day snapshot pulled during a slow Tuesday. New Montreal brands shooting on a startup budget have a separate early-stage starter shoot guide. Once the baseline is in place, you have an honest reference point to compare against any later set of images, and a clearer view of which specific product pages in your Montreal storefront should be reshot first rather than refreshed across the entire catalog at once.

Ready to book a shoot? Contact our studio or review our pricing.

Product Photography Montreal How to Create a Unique Style

Developing a Distinctive Product Photography Style for Your Brand

In a competitive e-commerce landscape, having a unique product photography style sets your brand apart. Your photography style is a visual signature — it communicates your brand’s personality, values, and quality at a glance. For Montreal businesses competing online, a cohesive and distinctive visual identity can be the difference between a customer choosing your product or a competitor’s.

Understanding Your Brand Before Picking a Style

Your product photography style should be an extension of your brand identity. Before developing your visual approach, consider who your target customer is, what emotions and values your brand represents, and what sets your products apart from competitors. A luxury jewellery brand in Montreal will have a very different photographic style than an artisan food producer or an outdoor clothing company. Your style should feel natural and authentic to your brand.

Elements That Define Your Product Photography Style

Lighting and mood. The quality and direction of light sets the overall mood of your images. Bright, even lighting creates a fresh, modern feel. Dramatic side lighting adds sophistication and depth. Warm, soft lighting conveys comfort and approachability. Your lighting choices become part of your brand’s visual DNA.

Background and colour palette. Some brands are defined by clean white backgrounds. Others use consistent coloured backgrounds, textured surfaces, or styled settings. Your background choices and colour palette create instant brand recognition.

Composition and angles. How you frame your products — the camera angle, the amount of negative space, and the use of symmetry or asymmetry — all contribute to your visual identity. Consistent composition across your catalog creates a polished, professional impression.

Photography technique. From ghost mannequin photography for clothing to flat lay arrangements to lifestyle settings, the techniques you choose define how customers experience your products visually.

Consistency Is the Key to Strong Visual Branding

The most important aspect of product photography style is consistency. When every image on your website, Shopify store, Amazon listings, or social media feeds shares the same visual language, your brand becomes instantly recognizable. For a deeper dive into this topic, read our guide on how consistent product photography strengthens brand identity in Montreal.

Drawing Inspiration from Montreal’s Creative Scene

Montreal’s creative culture — from the galleries on Saint-Laurent to the artisan studios of Mile End and the Plateau — provides endless inspiration for distinctive product photography styles. The city’s mix of European elegance and North American energy, its distinctive architecture, and its thriving arts community all influence the visual language of Montreal brands.

Working with a Studio to Develop Your Style

Developing a unique product photography style is a collaborative process. At Product Photography Montreal, we work with brands to understand their vision and translate it into a consistent photographic approach. Whether you are launching a new brand or refreshing an established one, we help you define and execute a visual style that connects with your target audience. Contact us to start the conversation.

Building a Distinctive Visual Style for Your Brand

Developing a signature visual style is a process. These companion guides help you nail each layer — lighting, styling, backgrounds, and consistency:

Related Montreal Product Photography Guides

If you found this guide useful, the following resources from our Montreal product photography studio go deeper on adjacent topics:

Ready to book a shoot? Contact our studio or review our pricing.

From Flat to Fantastic: Styling Tips for Product Shoots

Why Product Styling Matters for Your Brand

Product styling is the art of arranging, preparing, and presenting products to look their absolute best in photographs. Great styling transforms ordinary product shots into compelling images that attract attention, communicate quality, and drive sales. For Montreal businesses investing in professional product photography, understanding the basics of styling — or working with a team that excels at it — makes a significant difference in the impact of your images.

Start with Product Preparation

Before any styling begins, your products need to be in perfect condition. This means removing all tags, stickers, and packaging marks unless they are part of the intended shot. Iron or steam all clothing items to remove creases. Clean all surfaces — fingerprints on glass, dust on matte finishes, and smudges on packaging are all magnified under studio lighting. For jewellery, professional cleaning and polishing before the shoot ensures every piece sparkles. Detailed preparation tips are covered in our guide on how to prepare your products for a professional photo shoot.

Styling Techniques for Different Photography Styles

Clean e-commerce styling. For standard white background product photography, styling means positioning the product at its most flattering angle, ensuring symmetry, and making sure every detail is visible. The goal is a clean, professional image that accurately represents the product, often via the light tent technique for small SKUs.

Lifestyle and context styling. Lifestyle product photography requires more creative styling — selecting props, backgrounds, and settings that tell a story about how your product fits into the customer’s life. The key is choosing elements that complement without competing with your product.

Flat lay composition. Flat lay photography is where styling truly becomes an art. Every element in the frame is deliberately placed — the arrangement, spacing, angles, and layering all work together to create a visually balanced and engaging composition.

Props and Backgrounds That Elevate Your Products

The right props and backgrounds can transform a simple product shot into an aspirational image. For food photography, rustic wooden surfaces, fresh ingredients, and vintage utensils create warmth and authenticity. For beauty products, marble surfaces, botanical elements, and natural textures suggest luxury and self-care. The secret is restraint — props should support your product, not overshadow it.

Colour Theory in Product Styling

Colour plays a crucial role in product styling. Complementary colours create visual energy and draw attention to your product. Analogous colour schemes feel harmonious and sophisticated. Monochromatic styling with varying textures creates a clean, editorial look. Understanding how colours interact helps you make styling choices that make your product the undeniable focal point of every image.

Brands new to styled imagery often find it useful to compare selected client galleries showing finished product and lifestyle work, since seeing the variety of finished frames helps them decide which styling direction best matches their own brand voice.

Styling for Different Selling Platforms

Your styling approach should match where the images will be used. Amazon main images require minimal styling — clean, white background, product-focused. Shopify product pages benefit from a mix of clean shots and styled secondary images. Etsy buyers respond well to lifestyle-styled images that convey handmade quality and creative care. Social media content demands the most creative, visually striking styling to stop the scroll. Before locking in your hero set, it’s worth reviewing the image specs for major marketplaces so styled frames translate cleanly into platform-specific dimensions and background rules. Brands graduating beyond marketplace listings often move into agency-brief product imagery, where the brief itself dictates prop choices, palette and frame structure before a single shot is fired.

Work with Montreal’s Product Styling Experts

At Product Photography Montreal, styling is an integral part of every shoot. Our team works with you to understand your brand aesthetic and target audience, then applies professional styling techniques that make your products look their absolute best. Whether you need clean e-commerce imagery or creative lifestyle content, we have the expertise to deliver. Get in touch today for a free consultation.

More Styling and Production Guides

If you liked this styling primer, dive deeper with these companion guides on set preparation and production:

Related Montreal Product Photography Guides

If you found this guide useful, the following resources from our Montreal product photography studio go deeper on adjacent topics:

Ready to book a shoot? Contact our studio or review our pricing.

Adapting your styling for Montreal natural light

Montreal sits near 45.5 degrees north, which means the sun travels a wide arc across the year and its angle changes dramatically between seasons. In December the midday sun stays low, casting long raking shadows that emphasise texture and edge detail. In June it climbs much higher, flattening surface relief and shortening shadow length around noon. A north-facing window in any season delivers steady, indirect light without the warm cast that drifts across a south-facing window through the day. Plan your shoot schedule and styling around this seasonal swing. For winter sessions, reach for white fill-cards to lift the deep shadows that low-angle light creates on the shaded side of glass and ceramic. In summer, schedule mid-morning or late-afternoon sessions for softer modelling, and lean on neutral mid-grey backdrops if your shoot spans seasons so colour temperature shifts do not produce visible cast drift between frames.

Lighting Secrets Every Product Photographer Should Know

Why Lighting Makes or Breaks Product Photography

Lighting is the single most important element in product photography. For collectors building a similar pipeline, working with a Montreal photographer who shoots graded slabs and raw cards translates the same controlled-lighting habits into card-grade output. The right lighting reveals texture, creates dimension, ensures accurate colours, and guides the viewer’s eye to the most important details of your product. Whether you are shooting jewellery, clothing, food, or cosmetics, understanding lighting principles is essential for creating images that sell.

Natural Light vs. Studio Light for Product Photography

Natural light can produce beautiful results for certain types of product photography, particularly for lifestyle images and social media content. A large window on a cloudy day provides soft, even light that flatters most products. However, natural light has significant limitations — it changes throughout the day, varies with weather, and is difficult to control precisely.

Professional product photography studios in Montreal use controlled studio lighting because it offers consistency, repeatability, and precision. When you need every product in your catalog to look consistent — which is critical for e-commerce — studio lighting is essential. At our Montreal studio, we use a combination of strobe lights and continuous lighting, each chosen for the specific requirements of the product being photographed.

Key Lighting Techniques for Product Photography

Diffused lighting for soft, even illumination. Large softboxes and diffusion panels create soft, wrap-around light that minimizes harsh shadows and reveals product details evenly. This technique is particularly effective for white background product photography and for products with complex textures.

Side lighting for texture and dimension. Positioning a light source to the side of your product creates shadows that reveal texture — the weave of a fabric, the grain of leather, or the facets of a gemstone. This technique adds three-dimensionality that makes products look more tangible and appealing.

Backlighting for translucent products. Products like beverages, cosmetics in glass containers, and certain food items benefit from backlighting, which creates a luminous glow and highlights transparency. This technique requires careful balancing to avoid overexposure.

Rim lighting for separation. A light placed behind and slightly above the product creates a bright edge outline that separates the product from the background. This technique is especially useful for dark products on light backgrounds.

Lighting for Specific Product Categories

Different products demand different lighting approaches. Jewellery requires precise, directional lighting to create sparkle and highlight facets — often using small light sources and reflectors positioned carefully around each piece, which is the foundation of any controlled tabletop lighting setup. Clothing photography, whether flat lay or ghost mannequin, needs broad, even lighting that shows fabric colour accurately. Food photography often uses dramatic side lighting to create appetizing textures and steam effects. Reflective products like electronics, sunglasses, and watches require careful control to manage reflections and highlights. That same precision in highlight roll-off and shadow falloff is what separates a catalog grid from campaign-grade product shoots in Montreal, where the hero frame has to read on a billboard, a 50-inch screen and a 200-pixel thumbnail.

Common Lighting Mistakes to Avoid

The most common lighting mistake in product photography is using a single, hard light source, which creates unflattering shadows and uneven exposure. Other frequent mistakes include mixed colour temperatures that produce colour casts, insufficient lighting that results in noisy images, and overlighting that washes out detail and texture.

Professional Lighting for Your Montreal Product Photography

Getting lighting right is why professional product photography consistently outperforms DIY efforts. Our Montreal studio is equipped with professional-grade lighting specifically configured for product photography across every category. Whether you need clean Amazon-ready product images or dramatic lifestyle photography, our lighting setup delivers the quality your products deserve. Contact us to discuss your project.

Related guide: Lighting interacts directly with your backdrop choice — see our companion guide on backdrop & surface selection guide.

Advanced Lighting: Category-Specific Deep Dives

The general principles above apply everywhere; these specialty pages show how they adapt to challenging materials and buyer expectations:

Related Montreal Product Photography Guides

If you found this guide useful, the following resources from our Montreal product photography studio go deeper on adjacent topics:

Ready to book a shoot? Contact our studio or review our pricing.

How to Make Your Products Pop on White Backgrounds

Why White Background Product Photography Matters

A clean white background is the gold standard for product photography, and for good reason. White backgrounds eliminate distractions, ensure your product is the star of the image, and create a consistent, professional look across your entire catalog. For Montreal businesses selling online, mastering the art of products on white backgrounds is essential for marketplace compliance and customer trust.

Getting the Perfect White Background in Studio

Achieving a truly clean white background requires more than just placing your product on a white surface. Professional product photography studios in Montreal use a combination of techniques to create that seamless, pure white look. A sweep background — a large curved surface that eliminates the horizon line between the floor and wall — creates a smooth, continuous backdrop. Multiple light sources illuminate both the product and the background separately, ensuring the background reaches pure white without overexposing the product.

The key is lighting ratio. The background needs to be approximately one to two stops brighter than the product itself. This ensures the background renders as pure white in the final image while maintaining proper exposure and colour accuracy on the product. In an hour-by-hour walkthrough of the studio session, the lighting build for a clean white background is usually the longest pre-photo block of the day. At our Montreal studio, we use calibrated strobe lighting to achieve this balance consistently across every shot.

Post-Production Techniques for Perfect White Backgrounds

Even with expert studio lighting, post-production is essential for achieving marketplace-ready white backgrounds. Professional retouchers ensure the background reaches RGB 255, 255, 255 — the pure white that platforms like Amazon require. This involves careful masking of the product, cleaning up any background imperfections, and ensuring clean edges where the product meets the background.

For reflective products like jewellery or cosmetics packaging, retouching also involves managing reflections and ensuring the product looks its best without appearing overly processed. We saw this play out shooting a small-batch Montreal accessories line worth a careful frame, where every brushed-metal highlight needed isolated cleanup before the master file shipped.

Tips to Make Your Products Stand Out on White

While a white background provides a clean canvas, making your products truly pop requires attention to a few key elements. Lighting is everything — directional light creates dimension through highlights and shadows that give your product a three-dimensional quality. For clothing, using ghost mannequin photography adds form and structure against the white background.

Composition and angle matter too. Shooting from a slight angle rather than straight-on adds depth and visual interest. Including multiple angles — front, back, detail close-ups, and 360-degree views — gives customers a complete understanding of your product.

White Background Photography for Different Platforms

Each e-commerce platform has specific image requirements. Amazon requires main images on a pure white background with the product filling at least 85 percent of the frame. Shopify stores benefit from consistent white-background images for a polished storefront. Etsy allows more flexibility but white backgrounds still perform well for primary product images.

Beyond White: Complementing Clean Product Shots

While white backgrounds are essential for your primary product listings, supplementing them with other styles creates a richer visual story. Consider pairing your white-background shots with lifestyle photography for social media content, flat lay arrangements for editorial use, and styled detail shots that highlight craftsmanship and materials. Once a brand outgrows pure catalog frames and starts planning a full campaign, the next step is usually Montreal campaign photography for brand managers who need hero imagery to anchor seasonal pushes and out-of-home placements.

Get Professional White Background Product Photography in Montreal

Whether you need clean product images for your online store or marketplace listings, our Montreal studio delivers consistent, high-quality white background photography with fast turnaround. We work with businesses across every product category and platform. Contact us today for a free quote on your product photography project.

White-Background Expertise for Specialty Categories

White-background photography has different challenges for different materials. These specialty pages apply white-background principles to categories where the standard approach falls short:

Why a Clean White Backdrop Often Reads Grey on Camera (and How to Fix It)

Plenty of DIY shooters set up a clean white backdrop, fire the shutter, and find the background comes back as light grey or beige. The fix lives in three small choices that most camera tutorials skip.

  • Meter bias. The camera’s auto meter assumes a scene averages to 18% grey, so a frame dominated by white gets under-exposed by roughly one stop. Shoot manual and push exposure compensation +1 to +2 stops, then read the histogram, not the LCD preview.
  • Backdrop should be one stop brighter than the product. Light the backdrop separately and meter it to clip just shy of pure white on the histogram’s right edge. The product itself stays in the middle of the histogram. Amazon’s seller specs require a pure white #FFFFFF background on main listing photos, and lighting the backdrop hot in-camera saves later masking work.
  • Custom white balance, not auto. Shoot a clean white card under your actual key light, set custom white balance against that card, then lock it. Auto white balance drifts as you move the product around and introduces colour casts you fix in post.

When DIY White Backgrounds Stop Paying Off (and How to Hand the Catalogue to a Studio Without Losing Continuity)

DIY makes sense while the catalogue is small and camera time is cheaper than the lost-revenue cost of waiting on photography. Once any of these signs appear, the math has flipped.

  • A single SKU is taking longer to mask than it took to shoot.
  • Repeat shoots no longer match earlier batches in exposure, white tone or shadow density. Buyers notice when a product page mixes warm-white and cool-white listings side by side.
  • Reflective or translucent items (glass, jewellery, packaging with foil) are eating disproportionate time per shot.

The handoff to a Montreal studio runs smoother if you bring three things to the first call: a small reference set of your best two or three existing shots with the lighting notes attached, the physical product (or a returnable sample), and the platform requirements you ship to. Ask for a single-product test shoot at typical market per-shot rates before committing the full catalogue, so colour and shadow consistency can be matched against your existing live listings.

Related Montreal Product Photography Guides

If you found this guide useful, the following resources from our Montreal product photography studio go deeper on adjacent topics:

Ready to book a shoot? Contact our studio or review our pricing.